ad

Showing posts with label Techy Tutorial. Show all posts

Converting a PowerPoint to PDF Using Adobe Acrobat X1 Pro Issues: This FREE tutorial Might Help!!

Hi Everyone!!

I have a sweet(and short) little tutorial that might be of help to some of you out there.

 I continued to get questions from people who were having some issues with font styles, text, or text frames not showing up after they converted a Microsoft PowerPoint document to a PDF using Adobe Acrobat X1 Pro. I decided to create a tutorial for those of you who might be experiencing this issue.

Although this tutorial has helped most, it will not solve all converting problems.

You MUST own Adobe Acrobat X-X1 Pro for this tutorial. Please be aware that I am using a PC, so if you own a MAC computer, the instructions might be a little different from the ones in this tutorial.

The newer versions of Adobe Acrobat Pro include a default setting that has caused many using the program hours of frustration. Follow the steps in this tutorial to disable this default setting to try and solve the issue you are having.

If you have an older version of Adobe Acrobat Pro, this tutorial might work for you if you accidentally or unknowingly enabled the accessibility and reflow setting in preferences.

I hope this is helpful!! If it is, please make sure to leave feedback and try to include the issue you were experiencing.


Thank you...

Happy Thursday...

And Enjoy!!

Tickle Me Tech: How to Create Attractive Cover Pages for Your Teachers Pay Teachers Products

Hi Everyone!! It has been a while, but I am here to Tickle you all with some Tech Tips!!! I have created a simple tutorial for beginners wanting to learn how to create an attractive cover page for products created for a Teachers Pay Teachers shop!!
Click the image above to download this tutorial from my TpT shop!!

One of the most common techy questions I get (pertaining to clip art) is how to use digital papers, frames and clip art in a document to create digital products. People often ask me how to add text over backgrounds or frames, or how to layer frames. Sometimes, I do wonder about some of my buyers... the ones who purchase clip art and then send me an email asking me how to use clip art. Many times, I have sat back in my chair thinking to myself how to even begin explaining this to someone. 

Me: Where do I begin?
My Brain: How should I know. Maybe you should start with a definition for clip art.

Me:Do they even have a computer?
My Brain: Probably in the classroom... and if there is one at home, chances are  - it is ancient!!

Me: Why does one purchase clip art without first knowing what it is for?
My Brain: Who cares... it's a sale - WOo HOo!! 

Haha!!
Well, after much debating with my brain, I finally came up with the perfect solution!!
I call it: Tickle Me Tech and it's my newest Tech series that will cover everything I know from the very basics to the most advanced. I am working very hard to put more tutorials together and I would eventually like to create a collection that can be downloaded in one zipped file. I even created a cute logo for the series. I came up with the name because I always feel "tickled" with joy whenever I learn something new and techy. I also know how excited many of you get when you learn something new pertaining to technology and the only word to describe this sort of happiness is, tickled!!! 


At this point, I will be posting a new "tickle" once a month...that is...unless time miraculously decides to be my best friend. Lately, time feels more like an ex husband than a friend, but only time will tell what will happen in the future..hahaha. 

 Instead of cluttering a blog post with images no one can read, I am linking the image above to my TpT shop, where you can download the tutorial and read it when you are ready. 

I really do hope this tutorial is helpful to many of you in the beginning stages of building your online Teachers Pay Teacher Shops!! For those of you who are more advanced, please feel free to bookmark or better yet, PIN this tutorial to keep as a tool and reference for beginners you know.

I really love blessing all of you by sharing my knowledge and offering free resources and clip art. I put just as much time into my free resources as I do for those I put up for sale. I am always blessed by your feedback and I love hearing about what you create. Please continue leaving feedback and pinning anything and everything - those little efforts make a tremendous difference & I can use all the help I can get.

And another crazy thought.... I was looking at some stats today and I jumped for joy when I realized that nearly 100,000 people have downloaded my FREE Frames and Borders set on TpT!! That is Crazy Talk!!!! Then I quickly realized that not even a quarter of that number chose to follow my shop...

Sadness and a vanilla cone!!!

I think following someones store should be a requirement when getting a freebie; however, TpT works on an honors system.... hint.. hint....

SO...If you love the RAD and Awesome FREEBIES, please make sure to follow my shop.... it is just rude not to..hahaha!!! I never grab a freebie without following...I believe it is the best complement and appreciation I can give in return to the seller.

Have an AWESOME WEEK everyone!!!!

Here is a free background I created for this tutorial.. Feel free to grab this freebie, but please make sure to link this image back to my blog whenever you use it. You can read my Terms of Use for more copyright information. 
Commercial Use Okay

The digital papers and frames used to create this tutorial and free product cover are available in my shop. This Kit will be marked down 50% this week only!!! Click the image below to grab this set. 

True Story, a Tutorial, and FREE STUFF!!!

Happy Monday Everyone!!!
 photo 3am_star_blank_zps7763ad17.png
I hope all of you are having a great start to a fun summer (if you are on summer break yet...some of you are  not... you poor things..haha). I have truly missed blogging and reading blogs over the last several months and I am making a pact with myself (and all of you) to write/blog everyday. I am going to make sure to post something everyday and I would also like to get more into writing better tutorials. I have learned a great deal about web coding and I would love to share some of that knowledge with all of you!!

I could definitely use a little push... Okay, who am I kidding?? I need a stern kick in the derriere (which I just had to Google to spell....haha) from all of you every once in a while when I start to drop off the blaggon  (Blogging + Wagon = Blaggon).

I think I may have just invented a new word... (yeah me).

So, any one of you can elect yourself to email me and tell me to get focused!!! Or better yet,  I give you permission to send me a someecard if need be... one like this...
and I will hear the message loud and clear!!  BWAHAHA!! I love these cards!!! I would really appreciate it... and I do not get offended over the vulgar ones either... call it a guilty pleasure if you will.

This reminds me of a story that happen to me several months ago, which I will so lovingly share with you, as this situation could also happen to you (or maybe it already has)..

True Story...
I once re-posted one of these cards that I thought was so hilarious even though it used the "F" word, and the reaction to the card was split quite evenly down the middle. Some people thought I needed to find my way back to church and that I should not be posting things that were out of "my" character....and the ones who weren't in shock, not only laughed with me, but quickly jumped in on the thread to defend my honor.

The truly hilarious thing about this was that I had quickly logged into Facebook in the morning, commented on a few posts, liked a few pics, saw the ecard, laughed Diet Red Bull through my nose, re-posted the image and then logged off for a few hours. It was only after I logged back onto Facebook that I realized I had caused quite a stir with the image.

I did feel embarrassed that I had brought some people to feel the need to comment with a sermon and a few Bible verses, but I was quite surprised at how many people (even those I didn't know) who jumped in to defend me. Don't get me wrong... I like to be looked up to and I never want to offend anyone, but I also have a dry sense of humor (need I say more). My sarcasm can also get me into trouble at times, but who likes people without flaws??

There is no mystery and intrigue in something that is perfect, in fact, it is the imperfections in the world around us that propels us to define "perfect". I am sure there were many people offended by Da Vinci's fascination and need to draw the grotesque in his time. Even though  Da Vinci was drawing people with abnormalities -people whom no one wanted to look at- no one can deny the beauty in his art. When we look at one of those images, we are looking at those people through his interpretation... one of great detail and intrigue and...even beauty.

Okay... maybe I am not necessarily comparing Da Vinci's grotesque art with the "f" word... or maybe I am. The "F" word, as text, is typography  - - typography is art - art can be vulgar and grotesque...see the connections??  Art is human history in its rawest form.

I can emotionally connect to typography as art and not be in need of a second baptism... is all I am saying...hahaha This was not the direction that I was planning for this post; however, since I am already in the thick of it and there is no turning back now (unless I want to start over....which, we all know if I do, will only prolong my lack of posting in the first place), I have decided to share some of that techy knowledge I mentioned earlier to you with a little "come-back" techy tutorial...

What to do if a friend on your FB feed posts something you do not like, but you don't want to un-friend the friend...

1. Hover your mouse over the Facebook post (anywhere).

    When you do this, a little arrow will appear in the top right corner of the post.

2. Click on the arrow and a drop-down menu with a few options will appear as such...

       Follow Post
       Hide...
       Report Story or Spam
(see image below)


3. Click the "Hide..." option and the post will disappear and a couple of options will show up; although, it is not necessary that you choose one of the following options. You can simply "hide" the post and move on. I have rarely used these options below (see image)...

      You can  also choose to...
      * Unhide (just in case you clicked this option by accident)
      * Hide all stories from the person
               or...
      * Unlike the person

For this tutorial, I just took a screenshot of the most recent feed and I chose to "Unhide" the post right after I had chosen to "hide" it.  I was not offended by anything posted by Teaching 4 Real... just so we have that cleared away... hahaha

*********************************************************************************

Wow! This has been quite a productive post indeed... I had no idea I would be including a tutorial today!!! ha!

Well, I don't want to give you too much to think about on one day, so I am going to leave you with a link to a few NEW digital graphics I have completed.... as well as a FREEBIE!!


 U.S. Independence Day is right around the corner, so I thought I would share the new things I have created for 4th of July themes. For those of you who may not celebrate, these are still cute and can be used for just about anything...

4th of July Themed Graphics!!!
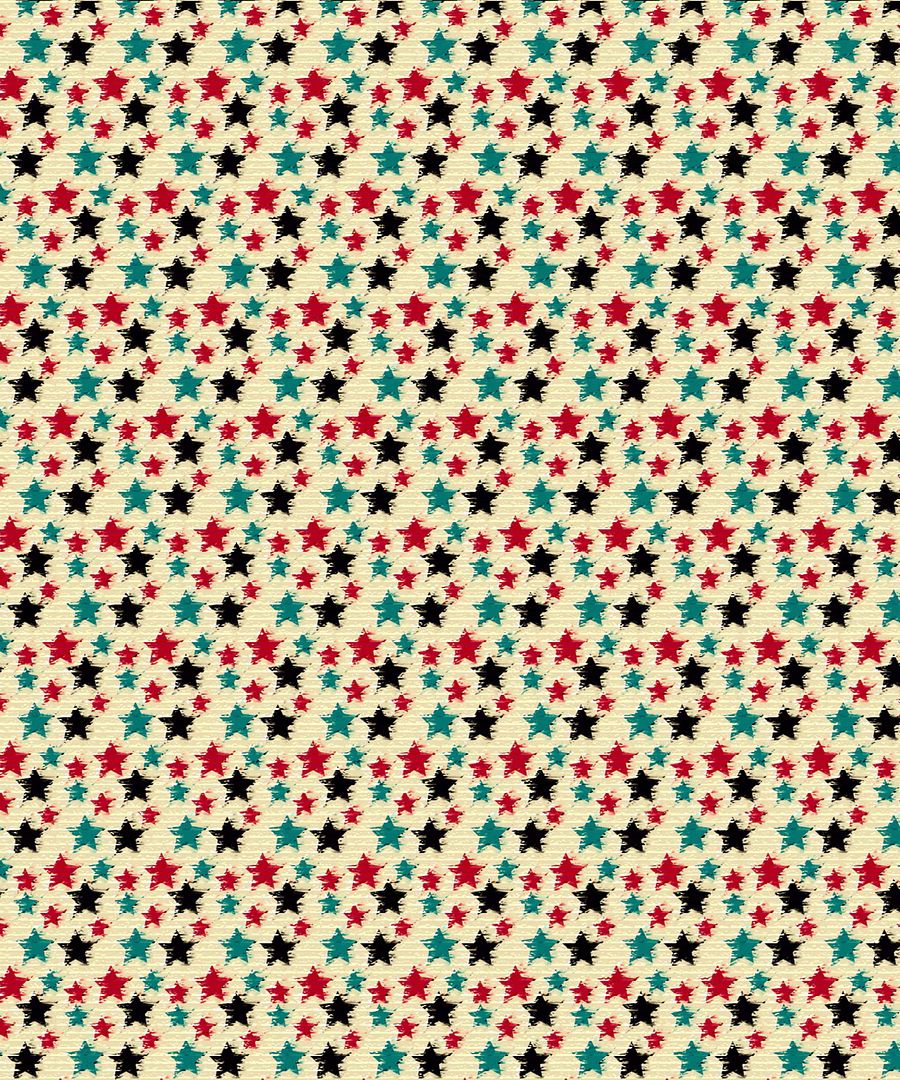
Okay, I admit... I went a little overboard with this first set of digital papers!!! This was not even the half of them either. I just went crazy and ended up having to create an insanely ginormous digital paper set because I did not have a color scheme I was focused on..hahaha

There are over 100 digital papers in this set....all with fun stars!! hahaha
 
Find this Set on...

Here are a couple free backgrounds (not included in the set) for you to grab. I played around with a lot of colors and I have a few that I LOVED, but they didn't really fit the theme I was going for...hahaha

For those of you with a MAC  - I LOVE you too... Click on the thumbnails below to grab these FREE digital backgrounds/papers from my Free Backgrounds Photobucket Album. I add to this album every now and again, so it might be something you will want to bookmark...Enjoy!! 
Please read my Terms of Use before using any of my free graphics.
 photo 3am_stars_24b_zpsa6917bf8.jpg   photo 3am_stars_24a_zps52745470.jpg

This set speaks for itself... This one is my favorite and includes some extra fun accents to create covers, notes, cards and anything else you can think of...


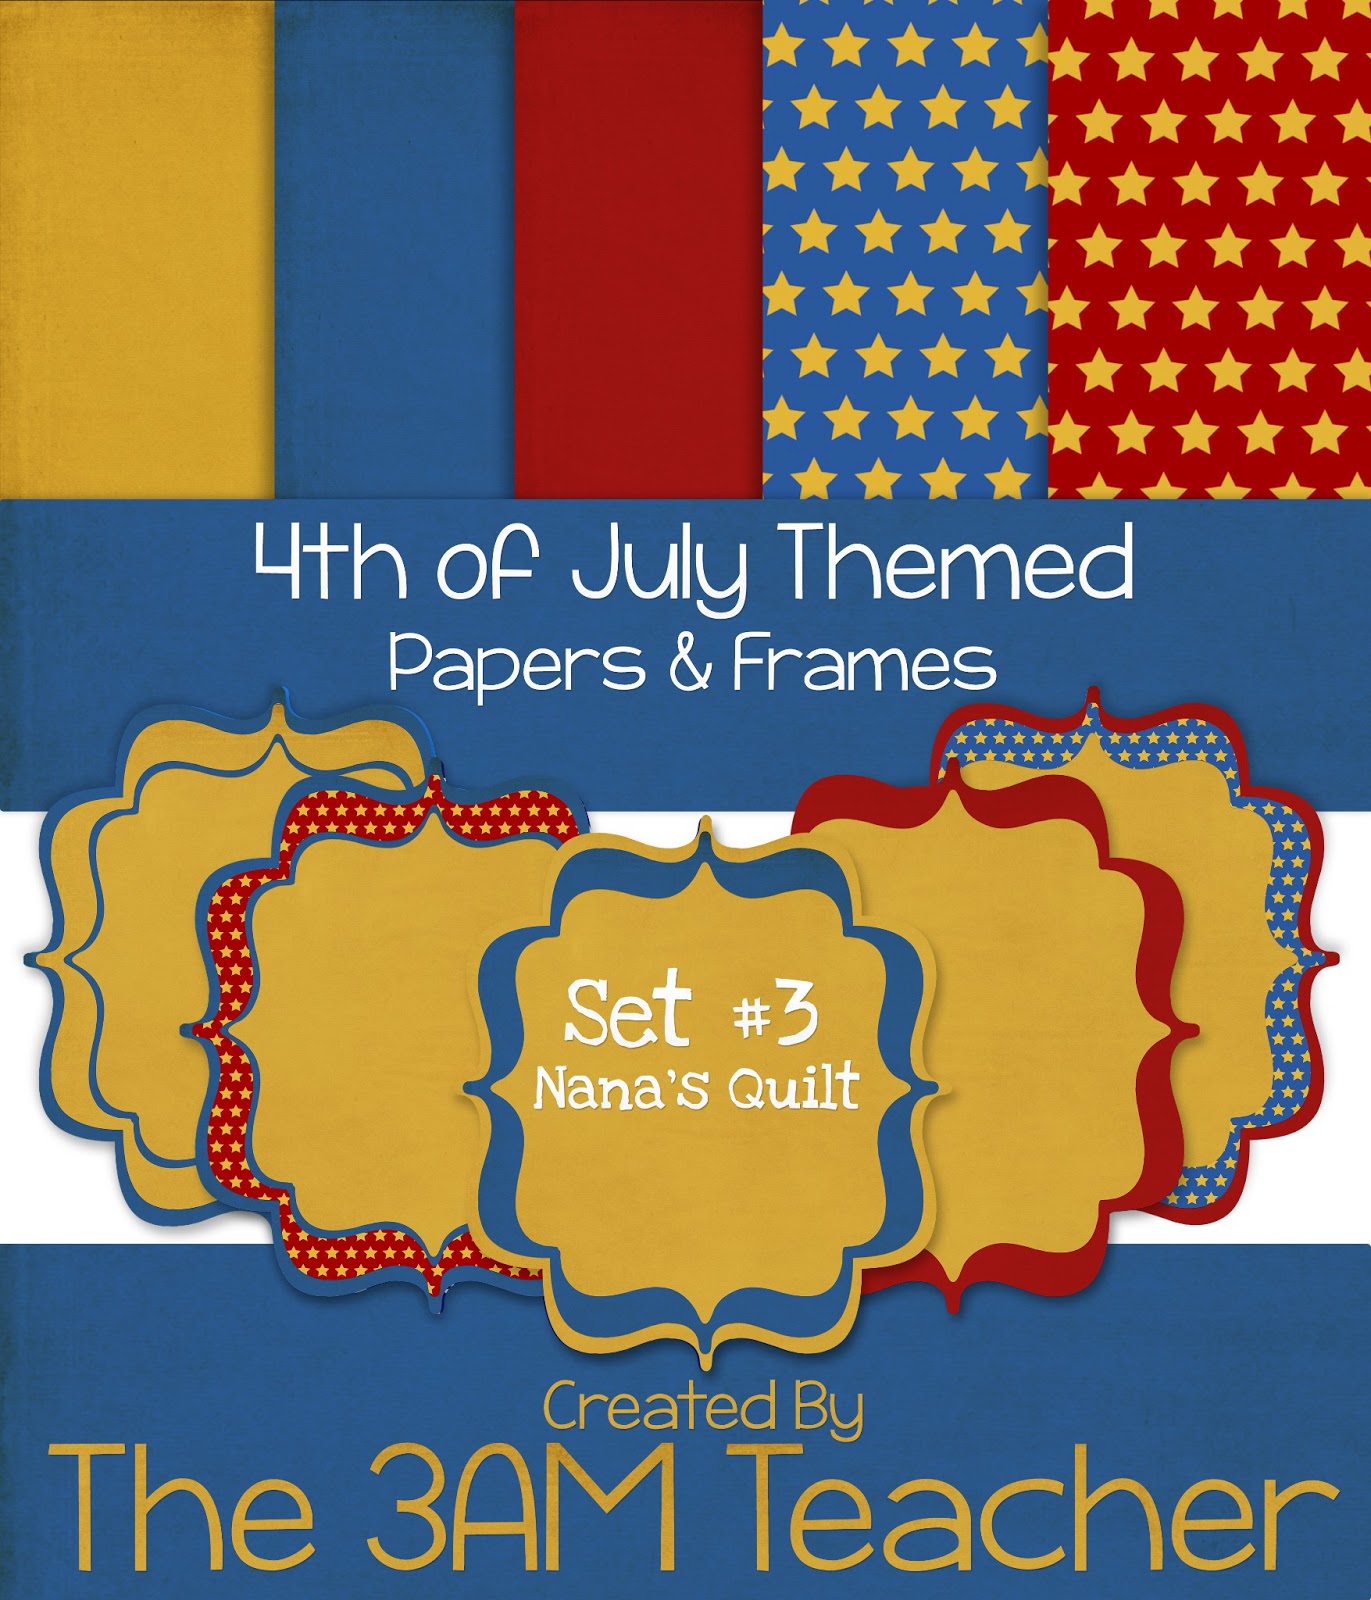
I also created a 3-part series of themed mini sets in a few of my favorite shades for 4th of July themes...

 Berry July

Shades of Blue

Nana's Quilt

4th of July FREEBIE
I created this set especially as a freebie for all of you who follow and support my work. Thank you for allowing me to do what I love everyday, for helping me to support my children, and for your encouraging feedback!! 

Click the image to grab this set on Teachers Pay Teachers

 photo 3am_star_blank_zps7763ad17.png 
Grab a FREE blank star in my Free Clipart Photobucket album. Click the image to travel to the album...


I have so much more to share with you, but I will save some for tomorrow's post!!! 
Blog-On, stay strong, and hoard my graphics in your hard-drives.....hahaha


PC Tips & Tricks Tuesday, New Love Monkeys & FREEBIES!!!


Resolving a SLOW Browsing session

(Make sure to clear your browsing history before starting this tutorial)

If you are like me, then you might spend a lot of time online from your PC. One of the most frustrating things to happen while online is having to work with a VERY S-L-O-W browser! Who Does??

What is the first thing you do when you encounter this problem??

Do you:
1. Click the window a million times; making the situation worse? ha
2. Take a cat nap between pauses and hope that when you lift you head, it will all be fixed?
3. Attempt to click the "X" or close the browser - only to find that closing the browser takes just as long?
4. Use CTRL + ALT + DELETE to force close and solve the problem, as thought those buttons were the electronic form of duct-tape?
5. Press the power button on your machine; forcing the computer to shut down (Big No NO)?
6. Pull up your big girl (or boy) panties, hold out your hand and DISS the screen as though insulting your computer will somehow make it feel bad enough to behave better later?
7. Walk away and forget the computers exist?

If you have done any of these, or all of them, you are not alone! hahaha

Well, today, I am going to give you ONE very powerful solution that works to speed up your browser about 90% of the time... Would you like to know how?? It is not difficult at all & you will be allowed to use your electronic duct tape (CTRL + ALT + DELETE)

This fix works on Google Chrome and Internet Explorer. I am sure you can use this technique on any browser, but don't hold me to that statement if you can't..hahaha. I have included direction for a PC user with Windows 7 or above.


What to do when your Browser is running SUPER SLOW...


1. Leave your browser open & use your keyboard to hold down the CTRL + ALT + Delete keys at the same time to bring up the task pane window. 

Once you click all three keys on your keyboard you will get a Windows option screen. Choose the last option to Start Task Manager. Make sure you are logged on as the ADMINISTRATOR.

2. Once the Task Manager opens, click on the PROCESSES Tab (see below)

The Process tab will show you everything that is currently running on your computer (I know, I have a LOT running right now).

2. Under the PROCESSES tab, scroll down the list until you find your browser. I am using Google Chrome, so I have scrolled down and found where my browser process is running. As you can see, my browser is not using a lot of memory or CPU. This is proof that I do not have a slow running browser at the moment..haha
If you are using Internet Explorer or another browser, look for the specific name on the list. I have two windows open at the moment, so naturally, there are two processes running in Chrome. In the past, I have used Internet Explorer and notice several processes running when I only have one window open! That is an Internet Explorer thing and I suggest that you choose the process that is consuming the most memory.

If you look below, you will notice that the window I am typing in is using up more memory than the window I have opened in the background. Find the one using the most memory and click to highlight that process.

3. Right click on that process and choose SET AFFINITY... on the list.

4. Once the AFFINITY window opens, you will see a list of processors or CPU. All of the processors are checked by default. I have quite a few processors, but most computers have around 2-4.

You can see from the image above that the affinity for Chrome is using all of the processors on the list. 

5. To save memory and speed up your system, UNCHECK all of the boxes, but one. It does not matter which one you leave checked (see below)

6. Click OK.

7. You can choose to close out the Task Manager OR set the affinity for other processes from your browser that may be using a lot of memory. 

8. Once you are finished setting the affinity for those processes, close the Task Manager and you should  notice a significant change in the speed of your browser!!

You will need to set the affinity in the Task Manager anytime your browser is running slower than normal. These settings are not permanent and will have to be changed when you open your browser. If your browser is running fine, you will not need to set the affinity.

If this does not speed up your browsing, try disabling all of your Browser extensions. Click on the links below for instruction on how to disable the extensions.

Disable Extensions in Google Chrome
Disable Extensions in Internet Explorer

Thank you so much for stopping by & I hope you have a SPEEDY recovery..hahaha.. I crack myself up! Tune in Next Tuesday for more PC TIPS & TRICKS!!


In other news... I would like to introduce my newest +Valentine Clip Art Set & give you a nice freebie to grab!!! Meet, THE LOVE Monkeys..hahaha

The LOVE monkeys are bright and full of cuteness! There are over 40 images; including the line art for each style & 11 matching digital backgrounds for your projects!! I hope you LOVE these little guys..hahaha


Purchase this set directly from my BLOG!!

Or...

Check out the LOVE monkeys:
TeachersPayTeachers
Teachers Notebook The traffic here is pretty pitiful, but I have hope..haha
Etsy

EVERYBODY LOVES FREEBIES!!! Here are a couple freebies from my newest set...just spreading the LOVE!!! Enjoy & please read my Terms of Use BEFORE using my graphics for personal and/or commercial use. Thank you!


Photobucket
Photobucket
I am sending you good vibes and GIANT LOVE!!
You can grab more Free Clip Art on my Free Clip Art Photobucket Album Below!!
Thank you for following my blog!! 
04fallingstar's Free Clip Art by The 3AM Teacher album on Photobucket

PC Tips & Tricks: Lesson 2 We're Going In!!

Techy: Tue-Wed...Thursday!!!
Keeping Your PC in Great HEALTH
Lesson: We're Going In...   Difficulty: Moderate


An important routine to begin this new year is to start cleaning out the inside of your computer on a regular basis; especially, if you use the computer as much as I do. I am not referring to the history or temoprary files either. I am referring to the actual inside of your computer...DUN DUN DUNnn! You may have never gone here here before, but I am challenging you to take an adventure and go where most never dare to go....haha

You might be very surprised to learn that dust particles can build up in every nook and cranny of your computer causing many problems including; a slow computer, over-heating, crashes, and complete melt-downs. 

Have you ever watched a documentary on people who are religious gamer's?? One distinct thing that you might notice when watching gamer's is their ability to be creative to prevent their computers from over-heating.....some place cooling fans, mini refrigerators, multiple refrigerators, or even custom made mini refrigerators that encase the entire computer!! 

You might be wondering why....Well, I will tell you why...it is to prevent the computer from over-heating and crashing/freezing. I can't say that this is a good thing to do; however, while using my HP doing graphic design last summer, I actually refrigerated my PC!! HA!! 

One of the most common problems many gamer's have with their computers is over-heating. It can be the death of any one person trying to run programs using high amounts of memory, CPU, and running the graphics card to the brink. I decided to build this computer because I was having many issues with over-heating on my HP's. Big computer manufacturer's make the computer cases so compact, that over-heating is a VERY common problem. 

Arizona gets hot in the summer and when the inside of my office is 80 degrees, my computer can hike far up into the 100's while I am using my graphic design programs. I resorted to refrigerating my computer on several occasions to save it from freezing, crashing, and complete failure. YES, I am that motivated!! I believe our A/C bill was around $600.00 that month and I am not even joking!! I had to run the A/C at 77 degrees to get my office cooled down to about 82. On top of the A/C running non-stop,  I would also run fans and a mini refrigerator to keep the temperatures from spiking. It was a massive under-taking and my new computer custom-built has truly saved me from having complete and total melt-downs.

I run my graphic design programs as much as a gamer does and the computer usage is quite similar. In order to keep my computer running at top speeds, there are a list of things I do on a monthly or weekly basis as part of a healthy maintenance routine. For the last session, I discussed ways to clean out the "junk in the trunk" so to speak, and this week, I will  show you how to carefully clean out the dust that builds up on the inside of the computer. 


Here are some healthy tips before I being this lesson.


1. Always make sure to store your computer in a room or an area that has plenty of ventilation and space. Tight spaces can cause over-heating and harm to your computer parts. 

2. NEVER, NEVER, work with your computer (laptop) directly on your bed, the couch, or on a blanket that will cover the ventilation fans!! This will not only over-heat your computer, it will also cause damage to the internal parts and in extreme cases, even melt wires. 

3. DON"T eat or even NIBBLE around your computer. This is one of the most difficult rules to follow for most. I don't even have to tell you why, and if I do, then this tutorial might be too advanced..haha


Time to Get Your Tech-Head On....We're Going in...


Let's Gets Started


What You Will Need...

You will not need much for this tutorial. Get your computer/laptop, 1-2 cans of compressed air (possibly more if you have not done this before), and a stylish screw-driver. You can settle for a boring one...or.. you can stop by the World Market and pick up one to fit your style (and that your spouse won't steal).
You might need to look up your computer specs online of you are not sure how to open up your "power brain" (case). If you go onto the manufacturer's site, you should be able to download a PDF manual for your machine... For example,

1. I can go straight to the manufacturer's website by typing the brand of my PC case in a Google Search

I typed in: In Win (The Manufacturer of my PC Case) and then clicked on the DIRECT manufacturer's website. Make sure you remember that I built my computer, so my method will be different from yours. Always go to the "Help & Support" section of any manufacturer's website. This will get you straight to where you need to be. 

Once I am there, I can look up the specific information for my particular case model (see below). If you look to the top left corner of the image, you will see a menu button. Once I click that, I can search for specific information about my model.

2. You can type in the exact model and manufacturer of your machine in the form of a question or statement (often easier than searching the manufacturer's site)
For Example, I typed: How to open the case of an in win dragon rider computer

and I found a nifty YouTube Video for my model: http://www.youtube.com/watch?v=-tYzhEx0UxM

You can also search specifically for your models' manufacturer manual and download the PDF.

Here are a few popular manufacturer site links I have included for your convenience:
HP
SAMSUNG 
SONY VAIO SUPPORT
TOSHIBA SUPPORT
DELL SUPPORT
LENOVO SUPPORT
WINDOWS PC SUPPORT

This is certainly not a complete list; however, it is enough to get you started in the right direction.


Now that you have...hopefully...found out how to open the case to your computer, I believe it is time we get started.
Before you remove the door to your computer case, make sure your computer is COMPLETELY shut down. I actually unplug my cords and position my case on top of my desk so that I don't end up tipping the can of compressed air to get into the tight places.

Un-screw the door to your computer case, being VERY careful NOT to yank the door off once you have the screws out. Some computers have fans on the doors, which are connected from the inside of the computer to the inside of the door (see the image of my computer above). Yanking the door off may cause damage to the wires...They should NOT be disconnected UNLESS you know what you are doing. 

I only have 2 screws to remove. Most computer cases have only two screws located on the back of the computer case for the door, so if you are at your 5th screw, then you might want to rewind a bit and refer to your computer manufacturer's website for help.


Using Compressed Air:
NOTE:  ALWAYS hold the can upright, never shake the can, and give the can a break if it gets too cold (this is why it is a good idea to have two on hand).

1. Begin spraying the dist off of the OUTSIDE of the case first. This will prevent you from having to re-spray the inside of the case after spraying the outside. 
Spray the outside areas first, paying close attention to the air vents, fans and ports.
Now to clean the inside of the computer!! Make sure to have good lighting available when you do this. You may also need a small dust rag (not a terry cloth - -a lens rag will do just fine) to wipe up residual particles that just won't seem to leave. You are going to start at the top and work your way to the bottom of the inside of the case. The picture below is a little over one week's worth of dust. I have seen computers that have a thick layer over-all.

 Don't freak if your computer has quite the collection. It will take you a bit longer to clean and you will need to use the lens rag to carefully wipe off the build-up on the fan blades (if they are accessible in your model).

As you can see below, dust builds up on the cooling tubes (those thick black tubes), the wires, on and around the graphics card, motherboard, and every part of every fan! And I even upgraded my fans to the "dust-resistant"ones...In case you are wondering what cooling tubes are, I have a liquid cooling system in my machine to help keep the temperature...well....COOL..haha


I start by spraying the fans at the very top from inside the case. To do this, I must tilt my case a bit in order to keep the can of the compressed air upright. You do not want to spray too closely to any of the parts. Hold the can about 2 inches from anything you are spraying.


Look at the image to the top right (below). I have highlighted the areas around the fan on my graphics card. This is often VERY dusty, so be mindful to keep your face at a safe distance from the dust storm that might occur.
Keep spraying the inside, making sure to be very careful NOT to disturb the smaller working parts of the "brain" of your computer.
If you have quite a lot of dust, you may need more than one can of compressed air on hand. Once the can begins to "sweat" you will have a hard time continuing to spray & you will need to switch out the cans.

Once you have finished spraying the inside of your computer, use the lens rag to clean the residual dust at the bottom of your case (if you have room to do so).


Make sure to position your door back on your case evenly, screw your screws (haha), and re-connect your computer. You are now ready to boot up! Your computer will love you for taking good care of him/her. Mine is a her, because she is white and glowy blue..haha


This is the end of my PC Tips Lesson 2; however, I will have more to come over the next few weeks! Thank you for stopping by and I hope that these tips prove to be helpful.

The colorful scribble frames are from my new "Cutest Backgrounds Ever" set.


Find this set on TPT, ETSY, TN


Find the singe scribble set on TPT, ETSY, TN

Thank you so much for stopping by & following my blog! I LOVE comments & would love to hear if you attempted to clean out the inside of your computer!!

P.S. If you would like to join my collaborative Pinterest board and share things you create using my graphics, please feel free to leave your Pinterest link in a comment below - I love to see what my art inspires you to create!!

Techy Tuesday on Thursday: How to Flatten Images & Secure Your PDF files


UPDATE FOR MAC USERS: 11/17/2012
Scroll to the bottom of the tutorial where I have placed a link for all of you. Sorry this was not in the tutorial before (-;

Hi everyone! 
There have been many inquiries on Facebook and in the TPT forums regarding the best way to secure images and content within a PDF file. You might be surprised, but many people were NOT aware that converting a document to a PDF does not automatically secure the content in the file...WOAH!!!
There are extra steps you need to follow to make sure your files are secure. This tutorial also includes directions for taking a few EXTRA steps to make sure the images (clip art, borders, graphics) are secure in your files. 

Many artists require that the images are "flattened" in a SECURED PDF file. However, most do not explain what it means to "flatten" the images or offer directions as to how to do this....but today.....you will become an expert....hahahaha..

Actually, I am just hoping you can understand my directions..hehehehe

You can view the images below and/or download the PDF file to save directly from my blog...WOWEE!!

Here we go:

Programs I used in this tutorial:
Adobe Acrobat X Pro
Windows OS (Operating System): Win 7
Microsoft Office (PowerPoint) 2010
  
This tutorial will help you learn how to add the most efficient security to your published files. More specifically, I will show you how to "flatten" images to prevent people from extracting (copying & pasting) images from the digital files you create.

Please feel free to contact me if you have any questions regarding this tutorial or you would like to offer suggestions to improve this tutorial.
3amteacher@gmail.com


Step One:
Launch Microsoft PowerPoint and start a NEW project.
For this tutorial I created a simple cover page with text and images. If you have already created a PowerPoint document, you can skip to the step that applies to you.

Here is the finished slide BEFORE saving. None of the images have been flattened and nothing is secure……yet.

Step 2: Saving the finished PowerPoint
Save your document as you normally would; creating a PPT version of your original file.
You want to save the original as a PPT in case you need to make changes to your file in the future.
Many of you might be used to saving your file and then immediately converting the file to a PDF. If I convert my PPT file to a PDF without taking any other steps (as I did in the picture to the right), you will see that I am still able to highlight, copy, and paste the individual images within the file. You might be shocked to discover that saving your document as a PDF does NOT secure the content. You must take extra steps to secure the content in your file.


Step 3: Saving Your PPT as an Image
Before converting your saved PPT to a PDF, we are going to “flatten” the images by saving each slide as an individual PNG or JPEG image. You cannot edit the flattened image files. I choose to save as a PNG, but you can choose to save your file as a JPEG.
Save PPT as an Image:
Go to FILE>SAVE AS
Once the window pops up, you will use the drop down menu at the bottom labeled: SAVE AS TYPE, and choose to save the file as a PNG (Portable Network Graphic) or JPEG.
Once you have chosen the file type, click save. You might be prompted to choose to save the current slide or all of the slides in the file. If you want to use all of the slides, then choose to save each slide as an individual PNG image. The images will now be saved in the place you designated on your computer or flash drive.


Step 4: Creating a Secure PDF from your flattened image files
Now that you have saved each slide as an individual image file, I will show you how to convert the images to a single PDF file.
Open the file on your computer or flash drive that contains the image files you just created. As you can see (to the top right), I have only one image saved, since I only had one slide in my file.
To create a PDF using the image, I am going to RIGHT CLICK on the file and choose to
CONVERT IMAGE TO A PDF
If you have more than one image to convert, highlight (IN ORDER) the needed files, RIGHT CLICK and choose to COMBINE SUPPORTED FILES IN ACROBAT (See bottom right picture)
In this window, you can add more files or remove files you do not want in the PDF. Choose to COMBINE FILES and your images will be converted to a PDF.


Quick Note:  
Sometimes, the images that you saved as a PDF will not convert in the correct order. Do NOT panic. All you need to do is open the bookmark preview in Adobe (right panel). Once opened, you will see thumbnails of each page in your pdf. Just select and drag the thumbnails and drop them in the correct order. The page number will change automatically once it is dropped in another position.

Step 5: Securing the PDF
You have not added security yet….

Open the PDF if it is not already.
Now that you have your PDF open, you can click on any area and notice that the entire page will be highlighted, rather than any one image. You now have “flattened” the images within a PDF file; however, you have not secured your PDF. If we leave the file as is, the buyer will still be able to copy and paste the entire page.

The only way one could “steal” images after flattening would be to take a screenshot of the image; however, the quality will be terrible and the image will not be by itself (see bottom right picture). The thief will have to do quite a lot of editing in a design program to get the image by itself.
Next, I will show you how to add security to your PDF to prevent anyone from copying the pages.


Step 5 Continued
Adding Security Options to your PDF

Click on the TOOLS tab located on the top right menu bar of your Adobe file.
Select and click the PROTECTION tab, ENCRYPT, & choose to Encrypt with a password.
Choose YES to change the security setting if prompted with this question
You will get a pop-up window with options for securing your file.
Choose your encryption settings: Add a Password
Make sure to UN-CHECK the first box to enter a password. This option prevents anyone from opening the file.


Step 5 Continued
Adding Security Options to your PDF

Check the box to restrict editing and then customize your settings.
Create a PASSWORD. 

To get a strong password setting make sure your password includes an uppercase letter and a number.
Choose OKAY once you have finished creating your password. 

You will be prompted to enter the password a second time before the window closes. Now, save your PDF and you have created a secured PDF file!


Congratulations!!! You did it!!!
I really do hope this helps some of you out and helps to secure your digital files! Click the download button save/print a copy of this tutorial.

Thank you for visiting! Come back and check out my post tomorrow to see what I post for FREEBIE Friday!! I was determined to be prepared this time and participate in the fun!!

The GOLDEN ticket for Mac users:

I noticed that many of you who read my blog are actually Mac users and I always feel so bad that I can't offer you the same help...so....as usual, I don't give up until I learn..HA!!

I found a helpful tutorial and had a friend "test" it out before sharing with all of you. For those of you using PAGES in Mac, there is a way to save your pages as a "grouped" JPEG image. 

Here is the Tutorial I found
CLICK HERE
Save this site in a reference journal, so that you can refer back to this site when you need help. I can tell you that YOU DO NOT WANT to use the help forums on the APPLE site!!!! They are filled with tons of information from many people that have NO CLUE what they are talking about. There may be forums in there that are helpful, but I did not even see one. In fact, I was so irritated about some of the advice people were giving that I had to sign in and comment - I couldn't resist!! I left the link to the correct tutorial in that forum because the people who actually needed help were being prompted to do things that caused more frustration! People REALLY should not comment in forums like that UNLESS they do know what they are doing and they are actually prepared to provide a step by step solution. It drives me bonkers when people just decide to continually add their 2 cents, because it causes far more harm than good. 

I also received some input from a friend - Tracee Orman, who  is just some small time blogger and seller on TPT...bwahahahaha - yeah right!...

Here is what she had to say...(referring to using Pages on a MAC)
You can group every object & text box as a single item, then do the "Arrange" > "Lock" to completely secure it. Just remember when grouping objects, you can't make changes (like adding a drop shadow) after it is grouped together.

Thank you for the info Tracee!! Please check out her blog (if you haven't already); however, please refer to the tutorial that I listed above if you have questions. I would hate to have her get a ton of emails from people saying, "The 3AM Teacher sent me to you to get help with using Pages"...I would feel horrible....truly....
However, I did make sure it was okay for me to include her knowledge before posting this...(-;

For you MAC users, please go through the tutorial and let me know what you think and if it was helpful or not...(-;
Kindergarten, 6th, 7th, 8th - TeachersPayTeachers.com 
Related Posts Plugin for WordPress, Blogger...