

Because I live in Arizona, I hitched a ride with two of my Arizona blogger buddies. Teresa Wilson from Confessions of a Teaching Junkieand Callie from Teach-A-Roo. These two ladies were a blast to hang out with and saved me from getting lost quite a few times. The photo below was taken the first night we arrived at dinner.

The drive up to Vegas seemed to go by really fast, but we did take a quick pit stop at a very interesting gas station along the way. Here is the picture I took of the welcome sign that brought us in... seriously, I can't make this stuff up!!


While we were taking photos in various wooden cut-outs, Teresa happened to spot a large army truck behind a fence and decided that I should hike all around in my heels...on rocks... to jump on the truck so she could get a photo....I did... and I haven't seen the photo yet.. haha I think I will probably be thankful she didn;t post it once I do see it.
As soon as we all jumped (I climbed) back into the car, I took off my heels and realized that my freshly painted nails were completely melted off!!! Just in time for Vegas... I tried to hide my feet the remainder of the time I was there because I did not bring any nail polish for touch-ups and I did not have time to get a pedicure while I was there. I probably should not have hiked to the army truck to get a picture in the heat!! haha
As soon as we got to The Venetian, the realization that I was staying there by myself quickly began to sink in. I felt like a lost puppy at first. Teresa and Callie got a room together at the Palazzo, which was on the opposite end of the Venetian. As I was checking in my luggage at the entrance, I noticed a little person just like me with wavy hair and immediately shouted out, "Rachel!!" Now... we talk online A LOT and I thought for sure she would recognize who I was, but she had to check my name badge... haha... and then she responded with... "OH MY GOD!! The 3AM Teacher... Michelle!! I thought you'd be taller!!" Apparently, she was not the only one who thought I would be much taller in person...bwahaha!! I often wish I was taller in person as well!! After seeing Rachel Lynette, I didn't feel so lost and was glad to see a familiar face as we all walked in. She is such a sweetheart and I could not be happier that she was the first person I ran into as I arrived.
I had thought we would be able to walk up to our rooms together and all of the presenters would be on the same floor.... well, I was wrong...again. Rachel gave me a tip to get a complementary upgrade on my room, but I don't think I asked the right way because she got bumped up to a private tower section and I got the 28th floor...by myself!!!
Let me just say that I have NEVER stayed at the Venetian and I was in awe the entire time. From the customer service to the artwork - everything was magnificent and fun to look at! However, it is such a ginormous place that I spent most of my time getting lost and trying NOT to get lost. Immediately after parting ways with Rachel Lynette, I got turned around and had to walk quite a ways to get back to the elevators to my floor. I did have the map that they gave me, but it was NOT helpful at all!! I learned very quickly to just find someone and ask... and then keep asking along my route as to not get lost along the way..haha. Even though I was a presenter, I had no clue what my room number was going to be until I actually arrived and checked in.
After about 20 minutes of hiking through the Venetian, I finally found my elevators and got to my room. I may or may not have fallen to the ground and kissed the floor once I finally opened the door to my room.
I was quite impressed with the room itself, but it was a little too quiet and lonely in there all by myself. I called down to the front desk to have them bring up my luggage and spent the time I waited admiring my room and trying to enjoy the view....
When I say "trying" I mean that I could not figure out how to open the white curtain covering the window...SO... to take the first photos of my view for my kids, I actually crawled in under it and pretended like I knew what I was doing. Later, when the helpful luggage guy arrived with my bags, I asked him how to open the curtains and he showed me the remote...laughing while he did... hahaha.. REAL FUNNY. He was actually amazingly sweet and helpful! Plus also... I tipped him really well just to make sure he didn't go downstairs and make fun of the guest who didn't know the curtains were controlled by a remote control. Who knew??


Thursday and Friday went by like a flash and I can't even remember everyone I got a chance to chat with, but I have so many amazingly happy memories!!! I had the honor of leading three sessions my first year in Vegas:
1. Networking Session with Nikki from Melonheadz (YESSSS!!)
I actually got to spend a lot of time with Nikki and she is even more fun in person than online!! I just love her.
The networking session took place first thing in the morning on Thursday - the very first day of the conferences and I got lost on the way to the room. When I found the elevator, I scrambled to put myself together, bent over to fix my shoe, and when I got back up I accidentally flashed the elevator guy who worked there!! Obviously, I wore the dress that had NO security straps.. OOPSIES!! When I finally got to the designated Networking room for our group, I noticed that everyone had no clue who I was. I looked down and realized that I LOST my name badge somewhere along my journey to the conference rooms, probably in the elevator!! I think the employee must have saved it as a token, because I never did find it and it was never turned back in. I had to get a replacement, but I was okay..haha
One thing I have learned is that I need to post more pictures of myself before next year...although, I really did enjoy seeing people's reaction when I told them my name!! I don't think I will ever get used to being "famous", but I will certainly enjoy my little 10 seconds of fame while I can!! That was a humbling and fun experience!
This networking block was my absolute favorite because I got to talk with so many people.. and they all came to us (Nikki and I)!! haha... I got a chance to really answer important questions and I felt like I got a chance to share some quality time with so many bloggers and TpT Sellers! I had an amazing time networking! I hope we get to do that again next year!! Nikki and I had so much fun chatting that neither one of us was writing any of the key info on the charts like we were supposed to... OOPSIES....again!! haha


The reason I loved the networking block was because I felt that I really got a chance to share some valuable knowledge with a lot of people. I learned a great deal about what all of you want, think and question about topics related to design and clip art. This definitely helped me, and after I was settled in my room for bed on Thursday, I jotted down some key points that I can use as valuable topics for later posts right here on my blog...here are a few I am looking forward to working on...
1. What do you use to create clip art?
2. What platform should I use to blog with and why?
3. How much money could I make creating clip art?
4. I created something popular on Teachers Pay Teachers that is not really related to what I teach and now I feel like I need to start creating more products related to what I teach. Should I keep creating the thing that is popular or should I focus on what I can use more in my classroom?
4. How long does it take to create a clip art set?
5. How do you keep everything (all of your files) organized?
6. How to you keep client info organized?
7. What programs do you use to create clip art?
8. Can I use an ipad or my phone to create clip art to sell?
9. How do you deal with custom work and keep up with your shop?
10. How did you learn how to create clip art and what made you start selling it?
Check in periodically, because my key takeaways will soon become a new blog post series and newsletter tip series in August. I had so much fun getting a chance to talk with all of you and if you were one of those people...reading this post now, then please let me know what session you attended and put your email, name and blog link in a comment below. I look forward to connecting with all of you! Just an FYI...I disabled comment links on my blog due to an increase in spam last year, but I will still be able to copy and paste the URL links. Please post the entire link to your blog and do not create hyperlinks in the comments below because they will not work. I chose to add some code to my blog that would disable hyperlinks in comments instead of adding that annoying captcha for all of you. I can't stand those! In fact, if you have them enabled on your blog, I am far less likely to comment.... just sayin'. That was a free tip for you!! haha
#2 From Sketch to Digital Masterpiece

The second day of my Sketch session, I was able to make it to the 6:30am sound check (yes... that is the correct time.. thank you TPT!!) and I got to spend a great deal of time getting to know Jared Cohen and Karen Liu from the TpT Team. I think I might have a geek crush on Jared.. he is brilliant!!
Right away I noticed that the room was set up differently and I no longer had the stage with a table, but now had a podium that was taller than I was and a tiny space to set up all of my equipment.... I must say that I was proud of myself because I handled that like a champ and grabbed a bouncy chair to stand on so everyone could see who was leading the session.. It was fun to be tall for a couple of hours!! I could get used to that!
Here is the one of the two pictures I have from my session. You can't see it, but I am standing on a chair... and I am still that short.
Why is there a larger chair behind me you ask? Well, that is the OTHER chair one of the staff found for me that was even taller, but I was too scared to stand on that one.
I do realize that I wore white cover-ups with ALL of my outfits in Vegas, which was only to hide the arm flab.... I was not wearing the same thing everyday.. promise..haha

Because my session was more of a live workshop and filled with content, I wasn't sure if anyone truly learned anything or whether or not it was helpful. Many people came up to me afterwards to tell me they got a lot from the workshop, which I really appreciated. In fact, after each of my sketch sessions I had a line of bloggers waiting to chat with me, snap a photo, or ask me a question! I felt like a little celebrity and I wish TpT had planned for more time between sessions to give us more of a chance to connect once they were finished. We were all quickly kicked out of the room and pushed to chat in the halls and I was trying to chat with people as I was forced to pack my bags...so to speak.. haha
If you attended my session, please add your name, email, and blog link in a comment below so that I can connect with you and get your thoughts. You know... because I DID NOT plan ahead and create a sign in sheet!! I continue to hit my forehead for not doing that!! I would love to read/hear your thoughts about what helped, what didn't help and how I could have improved it for you. On Friday's session, I was not able to use PowerPoint because the hookups in that room were a little different and my Cintiq Companion would drop out of display mode if I switched back and forth, so people who attended that one didn't get a chance to see my pictures during the introduction or any of the ones I had planned in the PowerPoint because I had to keep the screen on my Photoshop exercise file the entire time. Technical problems were a bit frustrating that second day, but I still had a lot of fun!! What is most important to me is that those who attended feel like they gained knowledge and were able to use the free resources I provided. I would really like to get invited back to lead a session or multiple sessions again next year because I really enjoyed doing that. I believe this is my calling... to combine my love of art with my love of teaching and do live workshops all over the country!!
#3 Thursday: Design Panel Back to back blocks (no potty break...BOO)
First, I have to say the being a part of the design panel felt like such an honor. I knew Nikki and Kimberly very well, but I did not know Blair or Julie as well and it was nice to get a chance to meet them and share our knowledge. We all got a chance to work on key topics individually and then bring those takeaways altogether during the panel. I actually had created a PowerPoint for my key takeaways, but due to time constraints, I was not able to use it. I did post it in my shop if you would like to download it and review what was included in my takeaways...
BONUS!! Click HERE to Download My Key Takeaways from the Design Panel Session!
I was literally so nervous, however, I was more focused on my need to run to the bathroom the second round of the design panel session... The first day, I lead sessions pretty much all day, so I had very little time for a break. After the Networking session, I got a chance to have lunch with Nikki from Melonheadz, Teresa from Confessions of a Teaching Junkie, and Terri Izatt from Kinder Kapers!! What a fun bunch we were! We rushed to the conference rooms after a quick lunch and then I did not get another break until after the Design Panel Session and after chatting.. so around 6pm-sh.... I was a little wiggly by then... haha


The Design Panel Sessions were amazing and I had a lot of fun getting a more formal opportunity (compared to the networking session) to share my knowledge and answer questions. What a BLAST!!! I seriously want to do this sort of thing for a living... I need to get out more!
One answer given had my eyeballs a little crazy, so I wanted to make sure to share some important info about the following question addressed during the panel.
HOW DO YOU LEARN THE PROGRAMS YOU USE?
Please do NOT.. and I will repeat myself again... DO NOT just Google how to use a program. That is, by far, the most ineffective way to properly learn to use any program.. whether it be Microsoft PowerPoint or Adobe Photoshop. Here are my thoughts and suggestions on that might be of help.
1. If you must conduct a Google search or "Google it", then PLEASE make sure the content you find is relevant and CURRENT. Programs change and update about every quarter.. that is about 4 times a year little things are added... you do NOT want to conduct a Google search on how to use a particular program because an old or irrelevant tutorial or video could cause you more frustration and make it more difficult for you to actually learn anything. Make sure that if you are doing a search, you conduct an advanced Google search and search by year as well as to use your operating system. PC directions often differ from Mac directions and if you swap them, you might find yourself wanting to take a hammer to your computer... even though it's not your computer's fault the content you found was not relevant.
2. Want to learn? Go directly to the manufacturer's website! For example, Adobe offers video tutorials and free tips from their experts. Who better to learn from than the people who created and tested these programs themselves? Many of the videos and tips are targeted for beginners, but if you are just learning a program... this will be helpful to you.
3. What programs you choose to use will greatly depend on what you need to create. Adobe Photoshop is designed for photo editing and the new design and updates makes it the perfect program for artists to get a natural style drawing and painting technique in digital art. Microsoft Word is designed for text and research papers.. it would not be ideal for creating digital products or clip art. Do your research and learn the programs before you begin creating something to sell. Remember, selling a digital product makes you a business person and you must prepare yourself before opening up shop and selling products.
4. Any new program you begin to learn will be a process and it will take time and commitment. Enjoy the journey of becoming an expert. Make sure to keep your programs up to date with the latest updates and upgrades. This will always give you an edge over other sellers and it will help you stay relevant and current yourselves. ---Very important if you plan on running an online business.
Final thoughts...
Never just blindly Google something important and ALWAYS continue learning new programs. Don't get stuck in a rut using outdated programs because you know them and are used to them... the new ones will save you time and make it easier for you to do so much more with your products! NEVER say NEVER [unless you are told to learn something new by Googling it] and NEVER stop learning and growing! That is my expert advice to all of you!! AND... it was free... you're welcome!
Thursday and Friday seemed to whiz by! I screamed with excitement, got lost, laughed, got lost, cried, got lost, was inspired, got lost, inspired others, got lost, hugged, got lost, ate great food, got lost, met so many new bloggers and sellers, and finally... got lost!! I really hope I get invited to lead next year because this entire experience changed me forever and for the better!! The Vegas experience was crazy beautiful!! I arrived on Tuesday and left on Saturday and wished I could have stayed longer... I seriously did not want to leave!!!
Below is the Presenter Photo taken at the end of the day on Thursday (after the sessions).. remember.. I had to go pee really badly, but I didn't want to miss anything!! I got to stand right next to Amy...almost smack in the middle... Where's The 3am Teacher? haha I could have never dreamed that I would be presenting with so many women and men I admire when I first began my TpT Journey, but I am so glad I did!! You can too!! Just click the image below to begin your very own TpT journey... the first step is opening a shop. I hope to hear all about your journey and watch where it takes you in the future!!

Funny story: Well, Rachel Lynette always has the best advice and one thing she did tell me before we parted ways to our rooms was to NOT touch anything in the fridge because the items are on top of a sensor and if I move anything, I will be charged for it. Luckily, I had an upgraded room and my fridge did have a little shelf that I could place my Diet Red Bulls on to keep them cold. I have one in the morning.. don't judge me.. it's my coffee because I don't like coffee. Then, anyone I talked to about my room also warned me about the fridge and high prices.
Well.... leave it to me to NOT grab a few waters from Teresa before heading to The Venetian side. I didn't want to follow them back to the Palazzo side because I was tired of getting lost that first day and I really wanted to take off my shoes.. haha I thought I had a water bottle in my room, but when I got there, none was to be found. The more I thought about NOT having a water, the more thirsty I became. My throat began to feel scratchy and the "no touch" waters were beginning to shimmer with light. I opened the fridge and wondered if I should or should not pay $6 for 12.5 ounces of water and the more I thought about it, the more I justified the cost! I'm thirsty - that's all that really mattered... Sure, I could drink a diet red bull, but that is not water and I want water! I COULD walk down the hall to the ice machine and wait for the ice to melt in the bucket and then drink that... but I was thirsty NOW!!
I slowly and VERY carefully opened the door to the fridge.. as though the sensor would go off with even the slightest touch... read the warning label...ignored the warning label about charges... and opened the door... remember, I was VERY thirsty. I might as well have been in the Sahara desert and the fridge a small spring I had just discovered...

I looked at the Fiji water...sort of cold, but oh-so tempting and REMOVED it gently from the shelf. I felt a sense of doing something very naughty as I took that water from the "no-no" fridge of high priced doom. There was no light or laser or noise... nothing that would indicate I was being secretly charged $6 as I had expected. It was as if it never happened and I liked it!!


"Now... there were some things charged to your room..." then his eyes looked at me while his head was still looking down at his computer screen. What makes this even worse was that I am only 5 ft tall and the counter top for checking out is about the same height, so I had to stand on my tippy toes, looking high up (because for some reason it seemed he had a stage back there and was extra tall on his side). My eyes got wide and I finished his question with a wave of my hand and said, YES... I drank those two waters, sir... and they were D-E-L-I-C-I-O-U-S!! I will gladly pay the $12 I owe for those.
I assume that by the way he approached the "situation", that most people act surprised and try to get their waters for free!! I owned up to my shenanigans and proudly showed him the second Fiji water bottle I placed in my purse...because I had left-over holy water from Vegas and I was keeping it!!
Here are some more snapshot memories...
Arizona Bloggers...


H-E-L-L-O Handsome Paul!! What an incredible guy and so much more quiet in person than I had imagined him to be... and yes.. that is the dress that gave the elevator guy a peep show... the entire rest of that day I was checking so much that people probably thought I loved my boobs a little too much. I did get a chance to sit and goof off a little with Paul and Deanna jump before some of the sessions were out the last day. It was the best quiet moment ever and I wish I would have taken a photo!! I just don;t think of taking photos when I am excited about seeing the people I talk to and love in person!! Deanna will have to wait until next year to get a photo with me...hahaha Deanna, if you are reading this, please give your mom a GIANT hug and kiss for watching out for me and reading my Facebook feed the first day I arrived! You and your mom made me feel very loved by making sure I wasn't completely alone!! I feel like a total loser for not getting a photo of us to cherish... next time! How did that not happen!!??

Black and white for a dramatic flair to the selfie...


Breakfast on Wednesday with some of the funniest women I now know in person!! What a blast! I have no idea why my arm looks like a raptor arm. I promise, my arms are a normal length. I was trying to get my head in the shot while, at the same time, trying not to overwhelm Teresa's head with my hair...


#1 Friday Session :From Sketch to Digital Masterpiece
This was me rockin' my session while standing on a chair because the podium was taller than I was... haha!! I am so thankful to Kady Dupre from Teacher Trap for taking this photo and posting it!! Even Jillian could only find one that the professional TpT hired had taken and it did not reveal the chair I was standing on... YES PEOPLE... I AM SHORT-FEET tall...

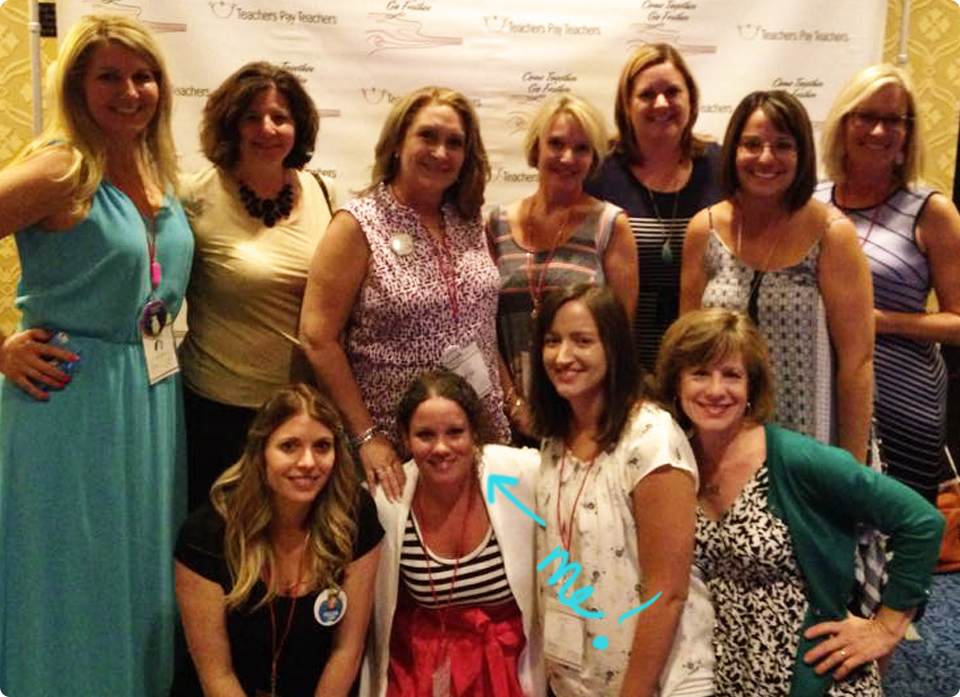
Thank you Tamra from Keeping Science Fun for posting this!
#3 Drinks and fun with some fabulous ladies!!
Thank you to the woman with the sweetest voice ever, Pamela, from Hedge Hog Reader for sharing this photo!! I am in the very back left corner in the black and white dress with the psycho lighted eyes... haha

#4 Thursday: Design Panel Session Photo-Op
Thank you Angelia from Extra Special Teaching for taking this photo! I am so glad I got a chance to meet you in person because I really enjoyed working with you on your blog design! You Rock!

#5 Thursday: Networking Session
Thank you Inside Bell's Brain for taking this photo, sending it to me and totally making my day! I had so much fun talking with you! Please ignore the hot mess that is my hair!! It was hot and my hair was on the fritz in Vegas from all of the running around...

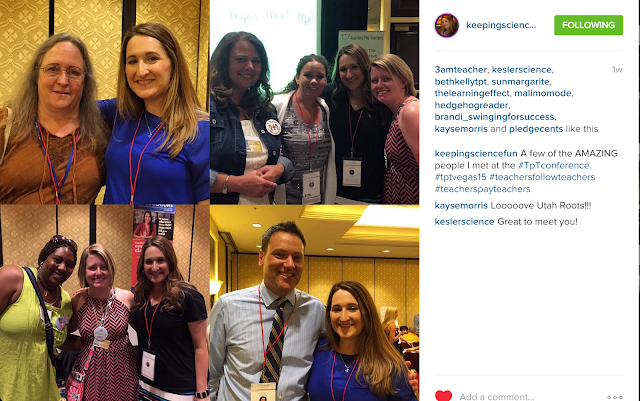
Thank you to everyone who emailed or messaged me a photo you took!! I have so many more memories to cherish now...
That was the overview of my time in Vegas and I hope you enjoyed reading through the chaos! I had so much fun meeting everyone and I will definitely take more pictures next year and be more prepared!! Remember, if you took any of my sessions, please let me know what session you attended and include your email and blog url link in a comment below. I would love to send you a thank you and get your thoughts!!
I feel truly charged and ready to rock the rest of 2015!! Thank you so very much for believing in me!!


.jpg)
.jpg)
.jpg)

.jpg)


